
We meet on the second Wednesday of every month at The Den, Cunningham Road, Westhoughton, BL5 2AN. 7:30pm until 10:00 pm.


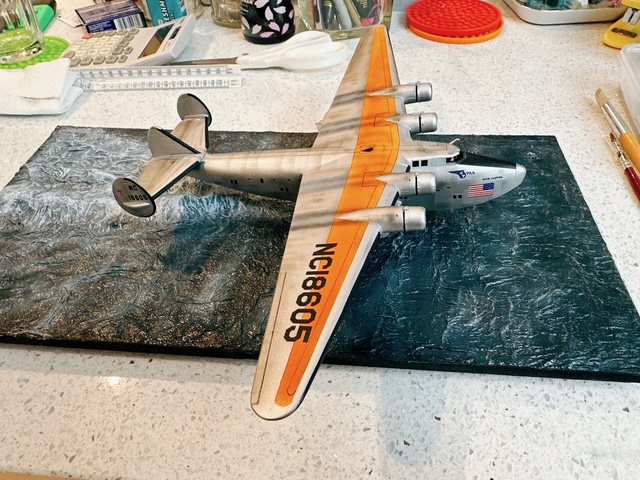


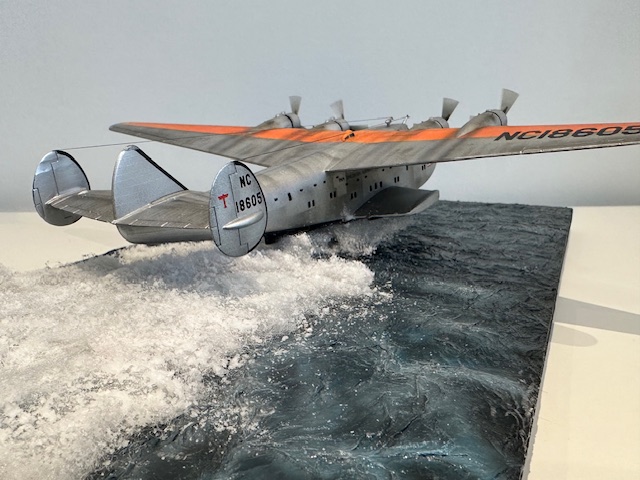
The Boeing 314 Clipper was a groundbreaking American flying boat produced between 1938 and 1941. Designed for long-range transoceanic travel, it was one of the largest aircraft of its time and reused the wing design from Boeing’s XB-15 bomber prototype. Only twelve Clippers were built, nine of which served with Pan American World Airways. Notably, in 1943, President Franklin D. Roosevelt became the first sitting U.S. president to fly aboard an aircraft—travelling on a Clipper to the Casablanca Conference to meet Winston Churchill, who arrived via a BOAC version of the same aircraft.
This was a second-hand kit, and while the build was generally straightforward, it came with several challenges:
Flash cleanup was minor but necessary.
Short-shot moulding affected the engine nacelles.
Missing parts included two propeller spinners and the top observation dome.
With the kit long out of production at the time, replacement parts weren’t available. However, I approached the build creatively, aiming to depict the aircraft in flight as part of a seascape diorama.
Modifications & Scratch-Building
Engine Nacelles
To fix the short-shot nacelles, I inserted paper tubes and applied plastic putty, shaping them with gentle sanding.
Propellers
I scratch-built four blurred propellers from acetate using a compass cutter. Spinner heads were fashioned from plastic rod, with extended shafts for easy removal during transport.
Interior & Windows
Given the aircraft’s compartmentalized interior, I blocked out the passenger windows using plasticard and painted them black post-bodywork. The windscreen was retained as the only clear part.
Observation Dome
With the clear dome missing, I sculpted Part 37 from white Milliput, sanded it to shape, and painted the windows black with orange framing using Citadel paints.
Cockpit & Pilots
Two pilot figures were created from rod and plasticard, painted in a pointillist style to suggest detail. The cockpit interior was painted dark grey to reduce light reflection.
Lighting
To enhance the illusion of flight, I installed two warm white LEDs in the aircraft’s light positions, feeding micro wires through the hull.
Stand Reinforcement
The hull was reinforced with scrap plasticard to support the clear rod stand used in the final display.
Painting & Finishing
After priming the model in light grey:
Orange Striping: Painted using a blend of Mr Hobby orange and yellow for a weathered effect.
Silver Bodywork: Applied after masking the orange areas. Random panels were masked and painted in varied silver and grey tones to simulate wear.
Undersides & De-icing Strips: Painted in a mix of black and dark grey.
Windows: Picked out in black.
Decals: Applied with Sol and Set to help the 20-year-old decals settle over raised panel lines.
Final Coat: A semi-gloss finish sealed the decals and gave the aircraft a sea-worn appearance.
Weathering: Exhaust stains and elastic rigging added realism.
Despite the missing parts and age of the mould, this build turned out to be a rewarding challenge. The finished diorama has been well-received on social media and even earned a Commended award at Scale Model World (SMW) 2024.
I’d recommend this kit to intermediate builders who enjoy adding personal touches and solving problems creatively. With careful painting and a bit of ingenuity, this 50+ year-old kit can truly shine.
Want to Create the Seascape Diorama?
Check out the Tips Section on this website for a step-by-step guide to building realistic water effects.